

Mastering Water Reflections in Landscape Photography

Landscape photography is all about capturing the beauty of nature and the world around us. One technique that can add an extra level of interest and drama to your landscape photos is incorporating water reflections. Whether you're shooting a serene lake, a babbling brook, or even just a puddle, the reflections in the water can add depth, symmetry, and a sense of calm to your images. In this article, we'll explore the best practices for using water reflections in landscape photography to create stunning results.

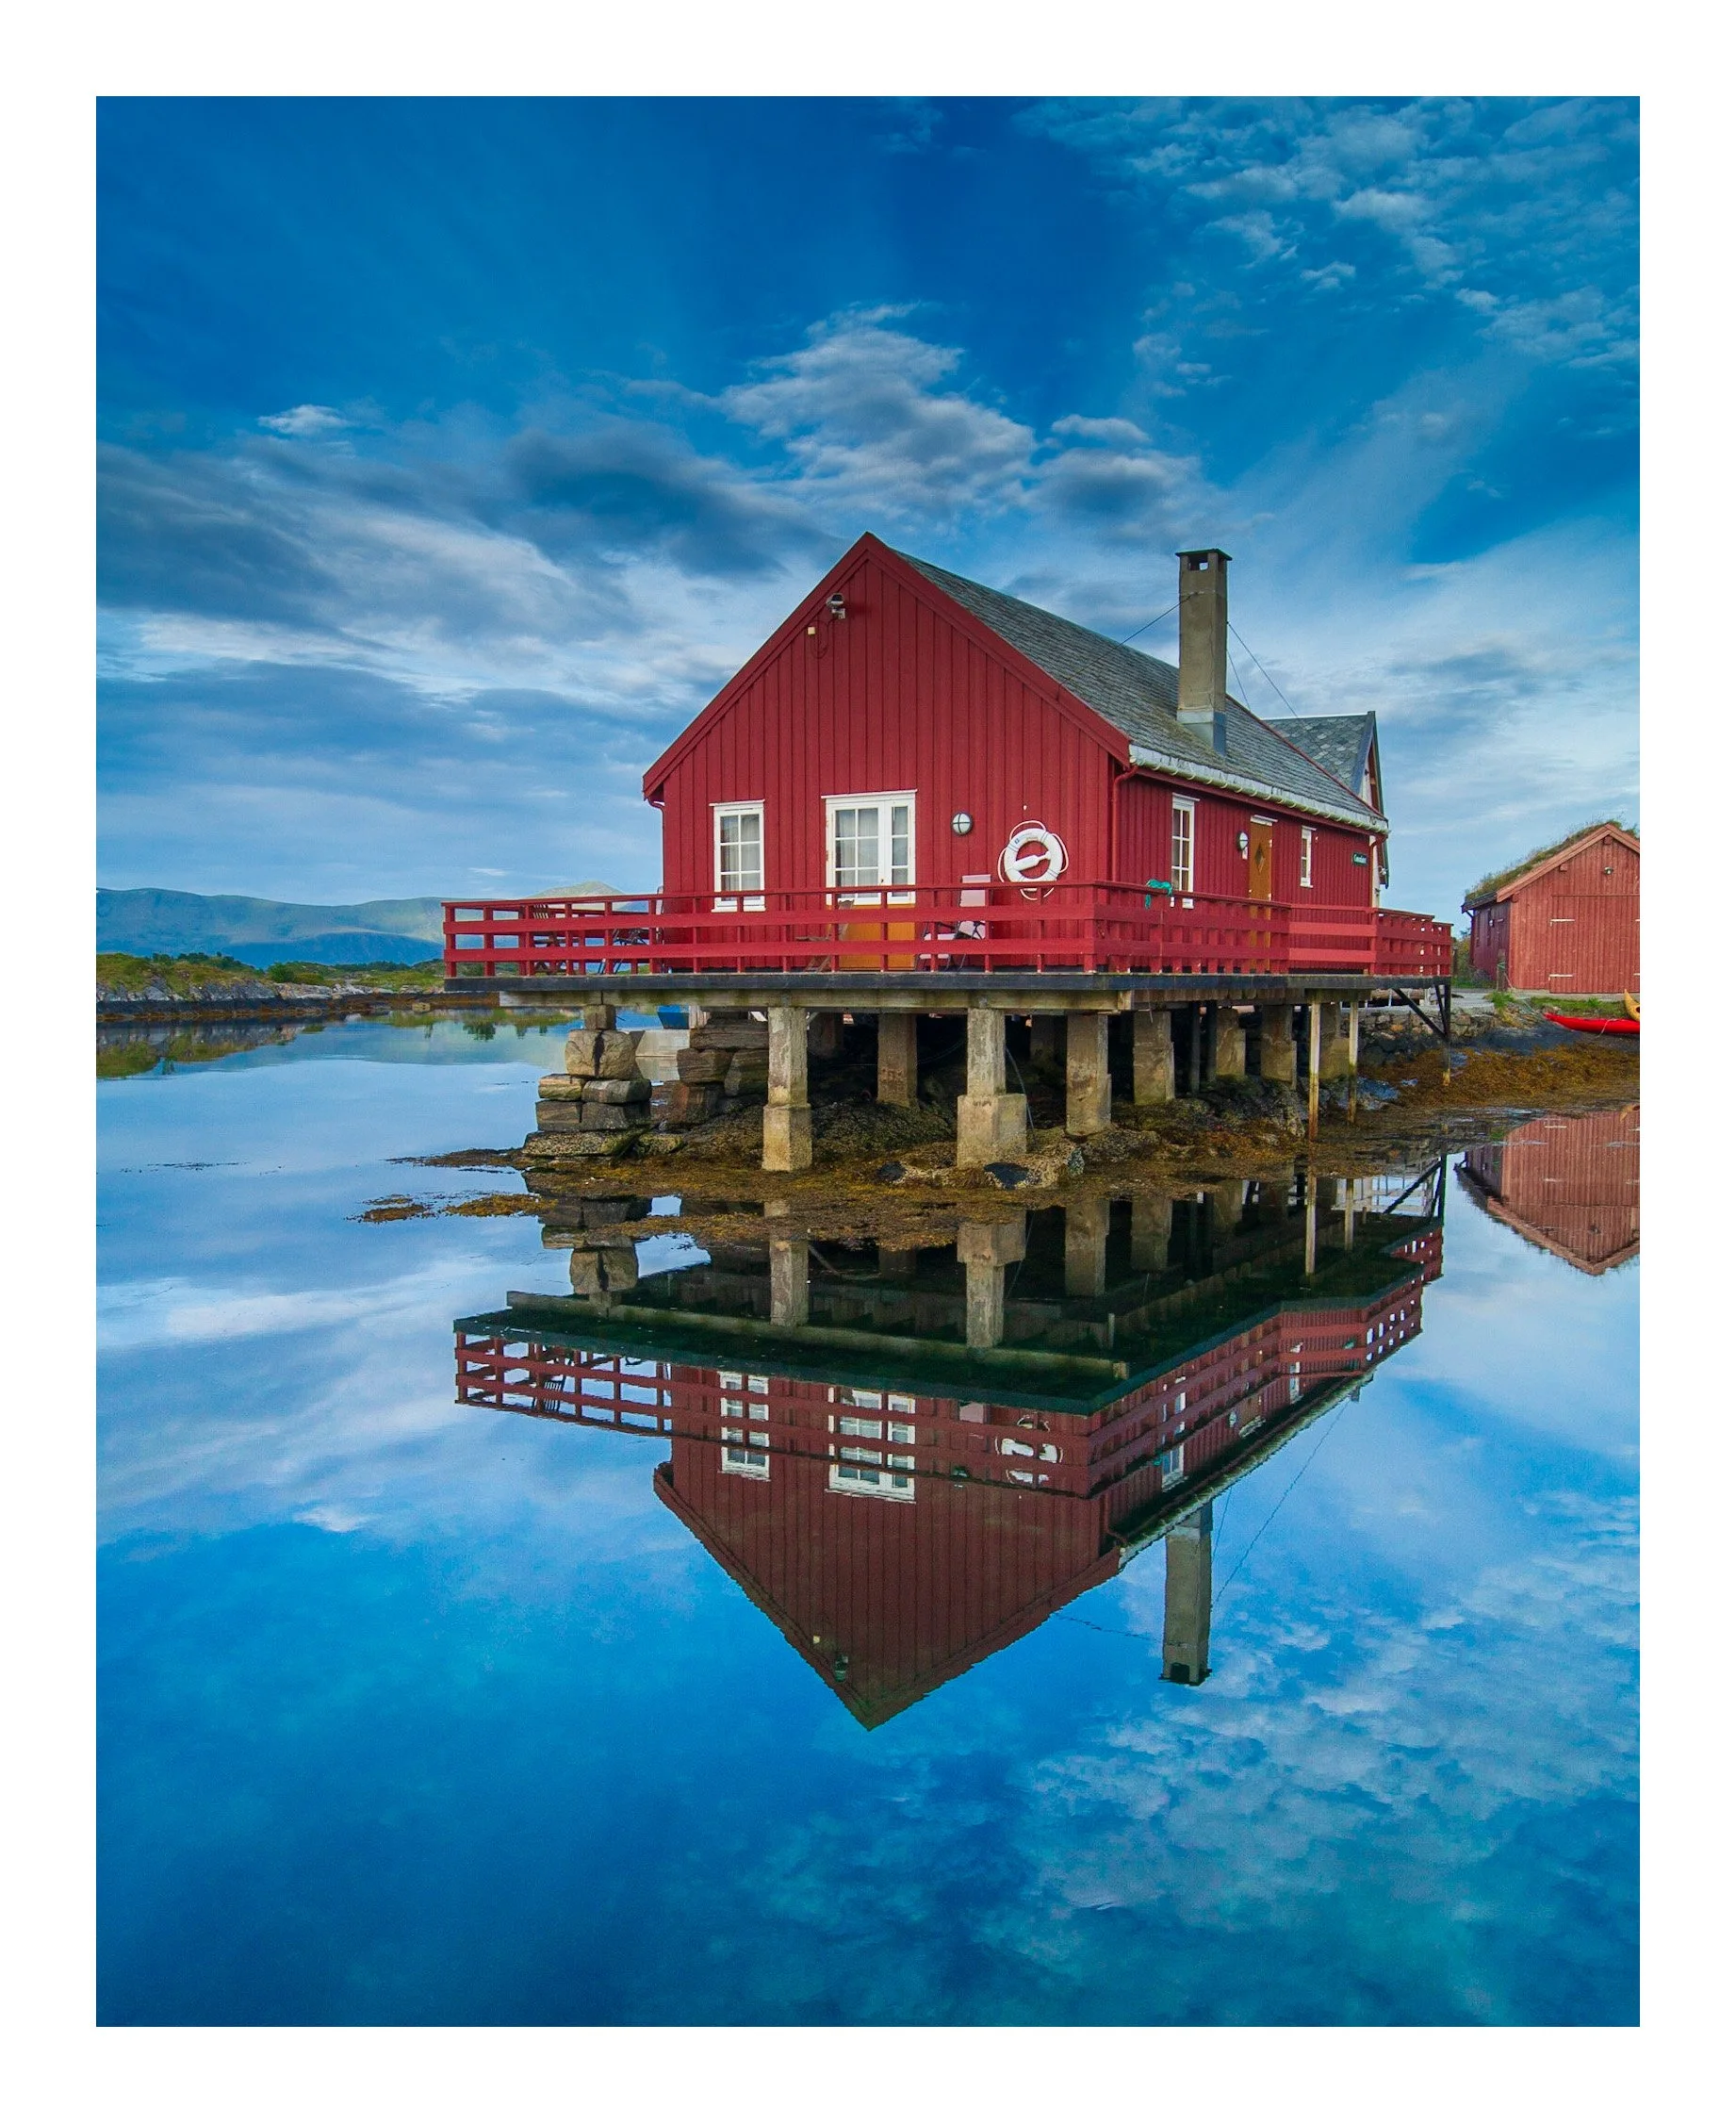
divide the image in half, with the reflection taking up one half and the actual subject taking up the other half. Photo: Are Ramstad
Water reflections can be used in a variety of different landscape photography scenarios. For example, if you're shooting a lake or a pond, the reflections of the surrounding landscape in the water can add a sense of depth and symmetry to the image. This is especially effective when the water is calm, as the reflections will be clearer and more defined.
When shooting water reflections, it's important to pay attention to the angle of the light. The best time to shoot is during the golden hour, when the light is soft and warm. This will help to bring out the colors and details in the reflections, and create a more pleasing overall image. It's also a good idea to use a tripod, as this will help to keep your camera steady and ensure that the reflections are sharp.

When shooting water reflections, it's important to pay attention to the angle of the light. Photo: Are Ramstad
Another vital aspect to consider when shooting water reflections is composition. A good rule of thumb is to divide the image in half, with the reflection taking up one half and the actual subject taking up the other half. This creates a sense of balance and symmetry in the image. Additionally, you can play with the placement of the horizon line, either in the centre of the frame or slightly off-centre, to add a sense of tension to the image.
play with the placement of the horizon line. Photo: Are Ramstad
Positioning the Camera for Water Reflections:
When capturing images of water reflections, finding the right balance between height and reflection is crucial to achieving the desired result.
Going Low for More Reflection: If you position the camera low to the water, you can capture more of the reflection in the image. However, this also means that there will be less separation between the foreground, midground (reflection), and background. This can result in a cluttered and confusing image.
Shooting from Higher Up for Separation: On the other hand, if you choose to shoot from a higher angle, there will be more separation between the elements in the image, resulting in a clearer and more distinct image. However, shooting from a higher angle also means you will see less of the reflection in the image.
Ultimately, finding the right balance between height and reflection is a matter of personal preference and the desired outcome of the image. Experimenting with different camera positions will help you determine the best approach for your specific situation.

This photo was taken from a view point a bit higher than the waters edge, therefore it has more separation between foreground, mid ground( refkection) and background. Photo: Are Ramstad
Water Reflections for Enhanced Depth and Mood
Water reflections can add a beautiful and dynamic element to your photos, helping to create a sense of depth and mood. Here are some tips for using water reflections to their full potential:
Using a Polarizing Filter: A polarizing filter is a must-have accessory for shooting water reflections. It reduces the glare on the water's surface and enhances the saturation of the sky and surrounding scenery. This helps create a more balanced and natural-looking reflection and makes it easier to see and capture the details in the reflection.
Adjusting the Shutter Speed: The correct shutter speed can make a big difference in capturing water reflections. If you want to capture the motion and flow of the water, use a slower shutter speed. A slow shutter speed can also help smooth out the water and create a clearer reflection, but in some scenarios, you need to freeze the water and get a sharp reflection, then use a faster shutter speed. Experiment with different speeds to find the best one for your scene.
Enhancing Water Reflections through Post-Processing
Post-processing is a crucial part of landscape photography, also when it comes to water reflections. In post-processing, you can enhance the details and colours in the reflections and make adjustments that can bring out the best in your images.
Here are some tips on how to enhance water reflections in post-processing:
1. Dodge and Burn in photoshop: Dodge and burn ( in photoshop) are two powerful post-processing tools that can help enhance the contrast and brightness in your image. Use the dodge tool to lighten areas that you want to bring attention to, such as the reflections in the water, and use the burn tool to darken areas that you want to de-emphasize.
2. Gradients in lightroom: If you are not a photoshop user, the dodge and burn effects can be achieved using linear or circular gradients in Lightroom. Add a gradient to your reflection and bring up the shadows or exposure to make the reflection pop. This can be done in both the mobile and desktop version of Lightroom

The radial gradient is a very good tool to dodge and burn in lightroom, this can also bee done in Lightroom mobile. Photo: Are Ramstad.
4. Adjusting the Levels: Adjusting the levels in post-processing can help to bring out the details and colours in the reflections. You can do this by adjusting your image editing software's brightness, contrast, and saturation levels.
5. Sharpening: Sharpening can help to bring out the details in the reflections and make them look clearer and more defined.
6. Colour Correction: If the colours in your image look dull or flat, colour correction can help to bring back vibrancy and saturation. To learn more about post-processing check out the links below.

Reflecting boat houses in Reine( Lofoten)
Photo: Are Ramtad
Water reflections can add a beautiful and dramatic element to your landscape photography. To capture stunning results, it's essential to pay attention to the angle of the light, use a tripod, and consider the image's composition. Remember to shoot during the golden hour and divide the image in half, with the reflection taking up one half and the actual subject taking up the other half. With these tips in mind, you'll be able to create truly breathtaking landscape images.


About the author:
Amateur photographer Are Ole shares his passion for the great outdoors and adventure through weekly photography tutorials and blog posts. With years of experience and a deep love for the craft, he offers tips and tricks to help improve landscape photography and post-processing skills. Explore new techniques, capture stunning shots with Are Ole's guidance, and join a supportive community for learning and growth in photography. The article was reviewed with the assistance of GPT-3 for the outline, grammar, and spelling
Don't let grey and moody weather discourage you from landscape photography. Learn how to capture stunning images by paying attention to mood, composition, light and using a polarizing filter. Elevate your photography game with these tips